Process sales – refund
Refund via cash
i.�Power on � POS�
ii. Charging���POS�
iii. Sign�In via POS�
�
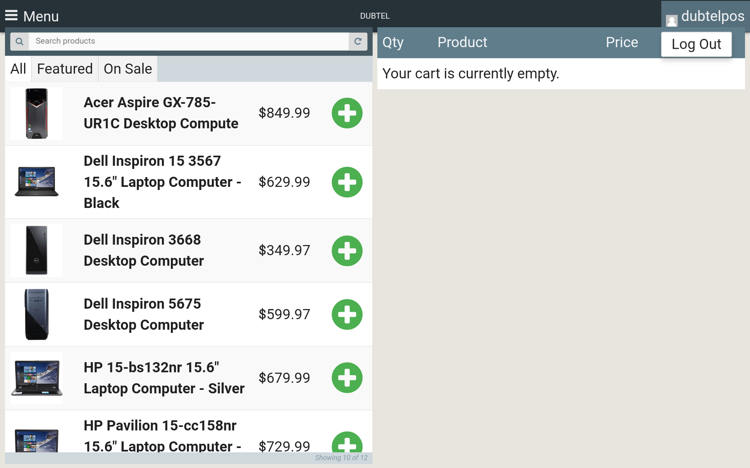
i. To Log out click on the user icon on top right of the home page. Logout option will display.
ii. Click log out as shown below.
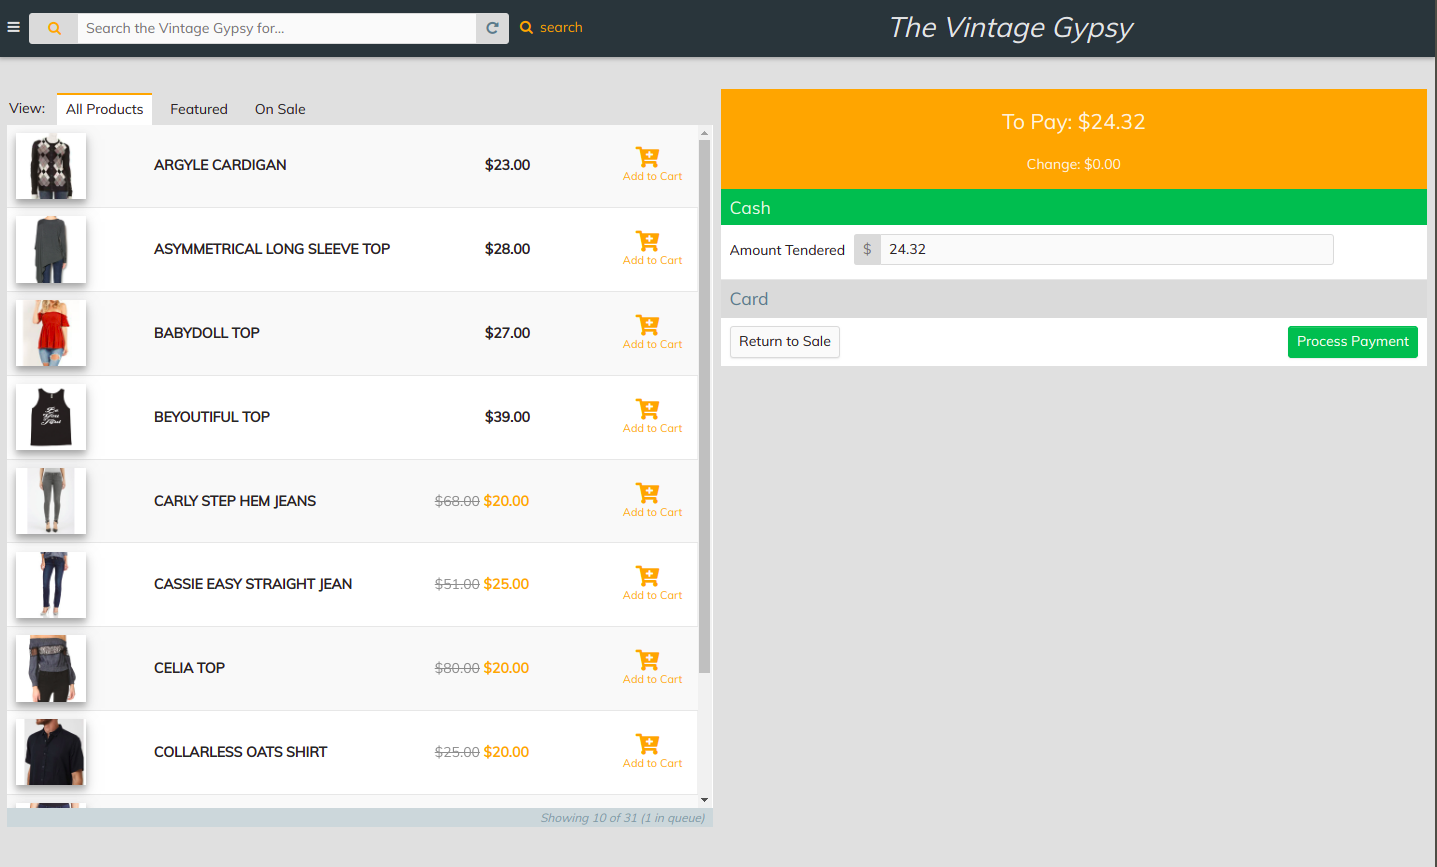
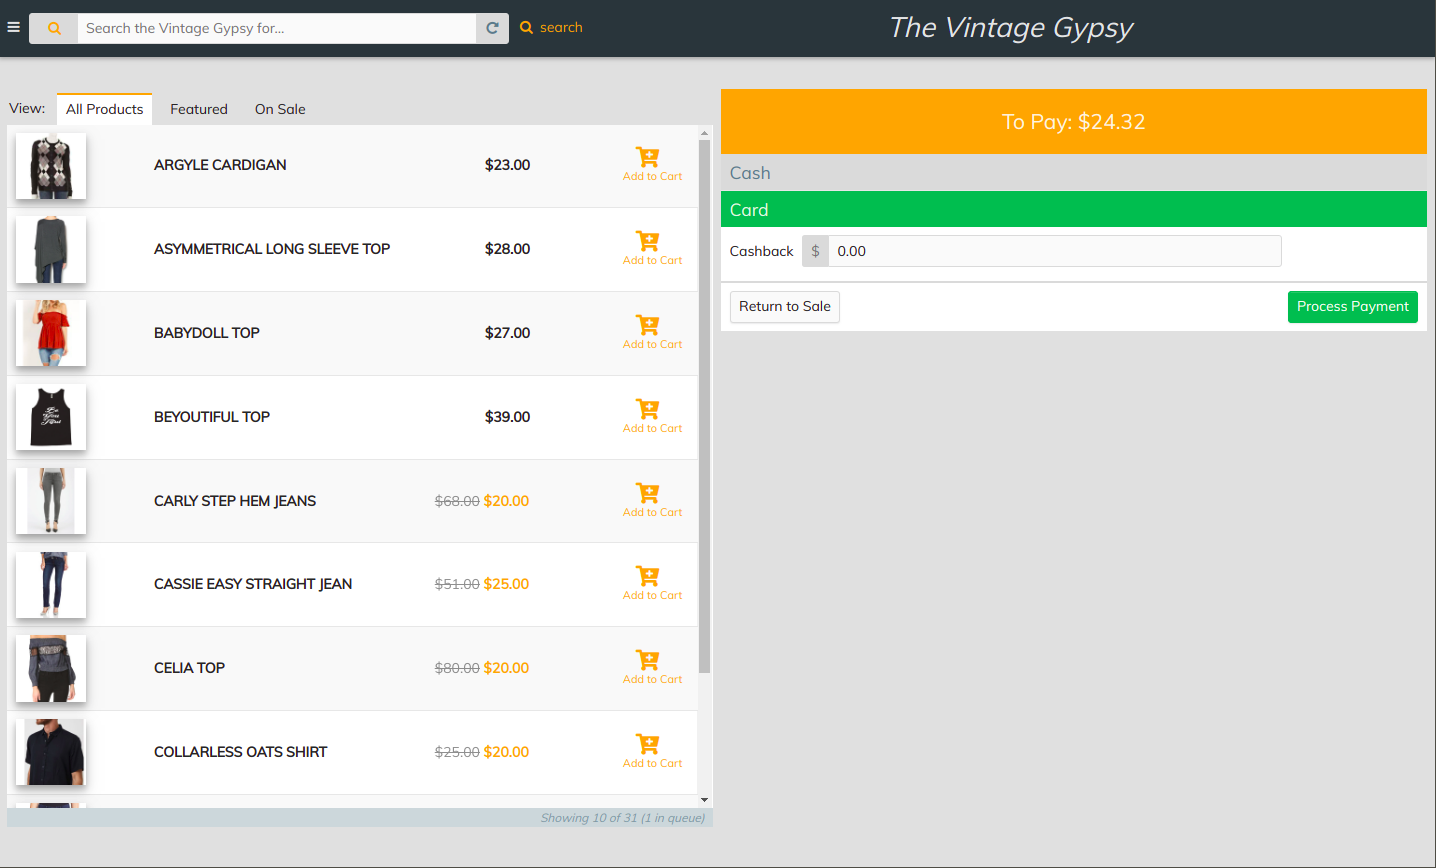
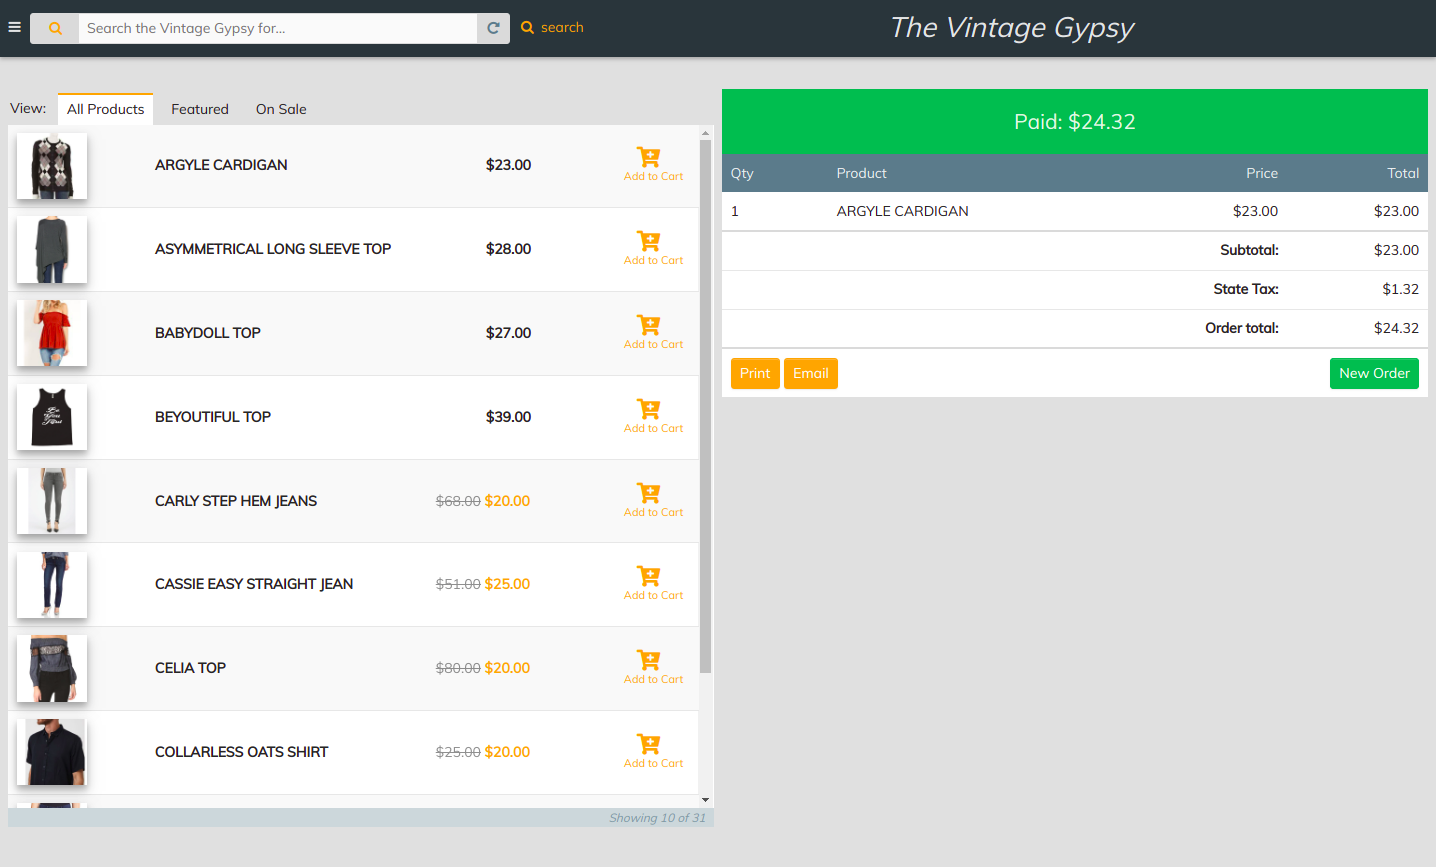


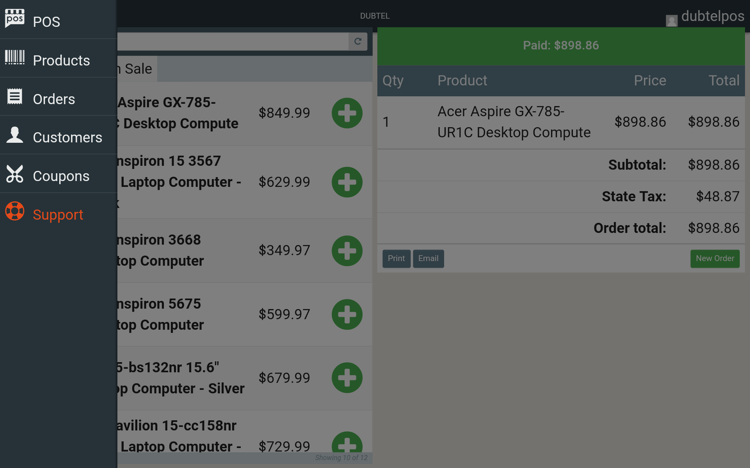
Checkout via Cash
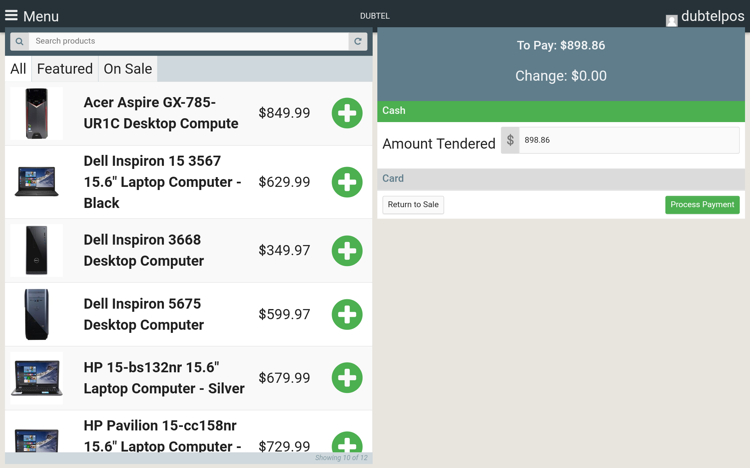
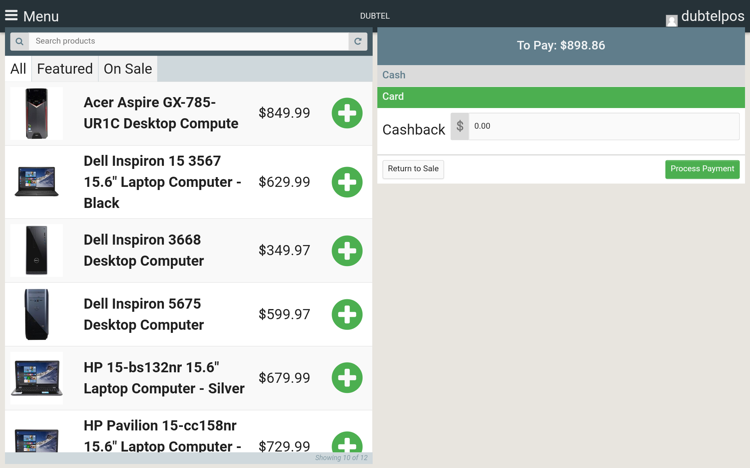
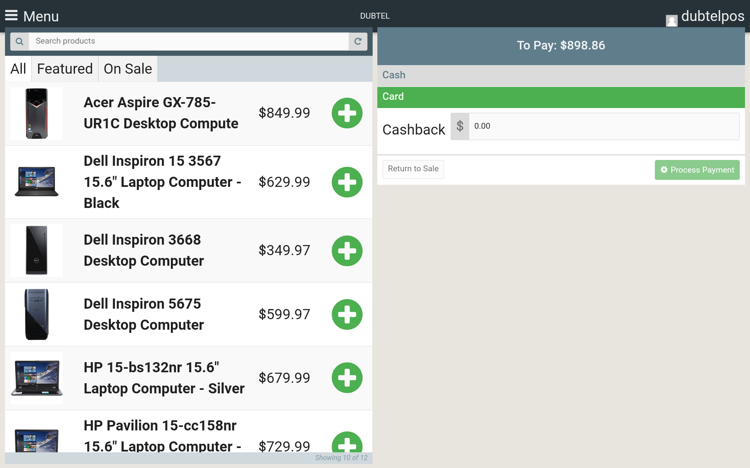
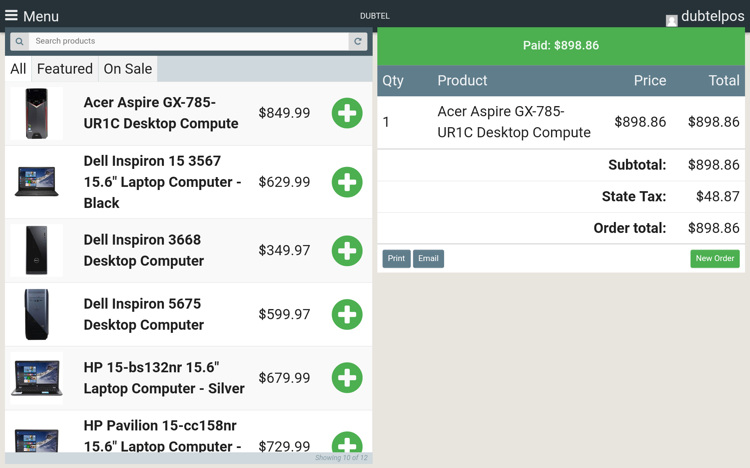
Check out via Card
i. Refund orders through cash


ii. Refund orders though card


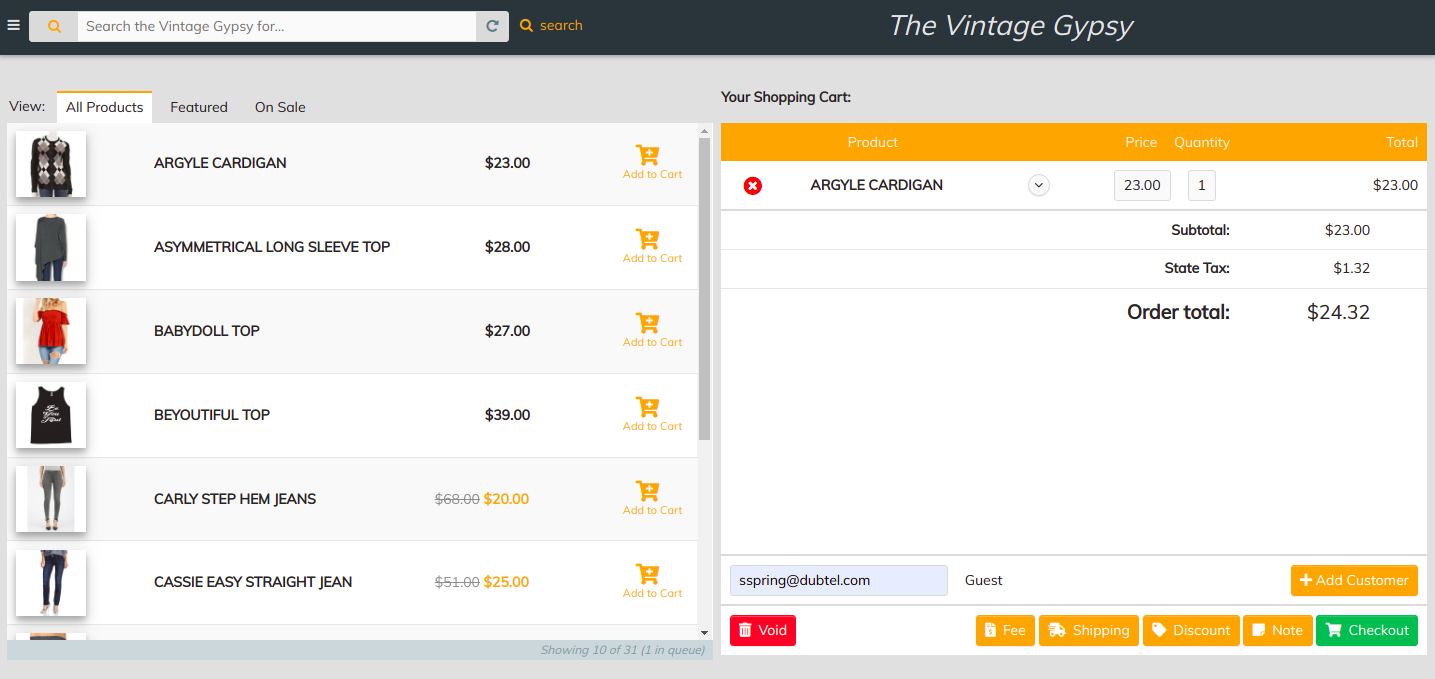
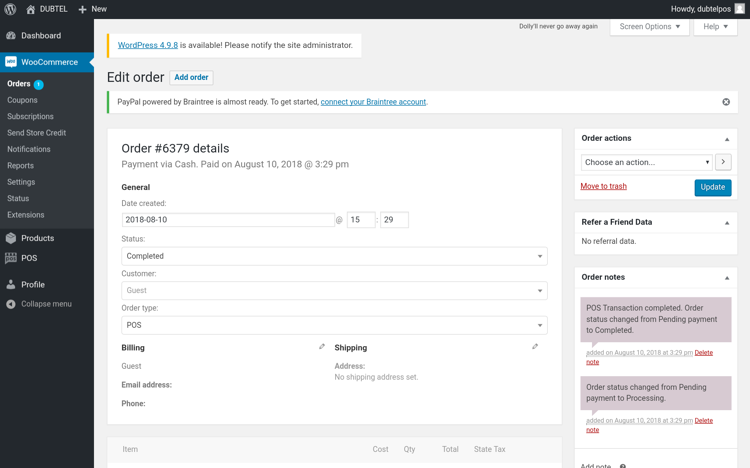
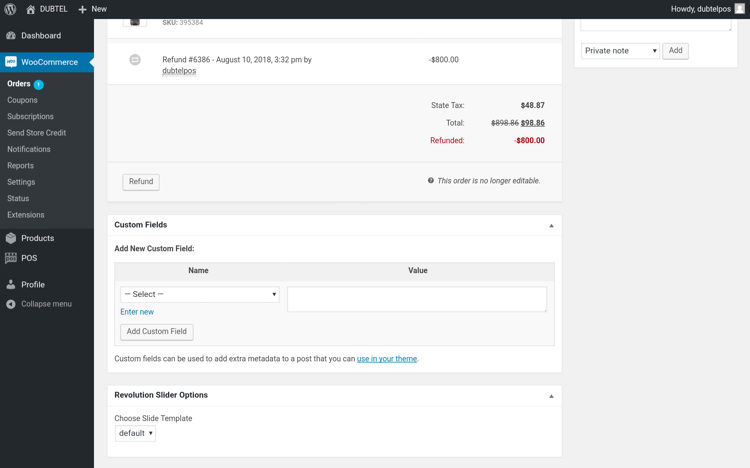
3. It will take you to the orders list as shown below.

4. Select the order to refund.
5. Edit order page is shown. Scroll down to order details
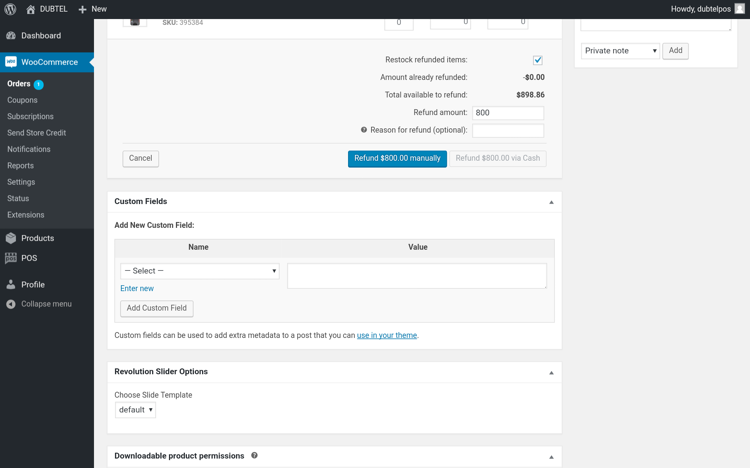
6. Click on the refund button.

7. Enter the refund amount and reason for refund which is optional as shown below.

8. Click �Refund $Amount manually� button.
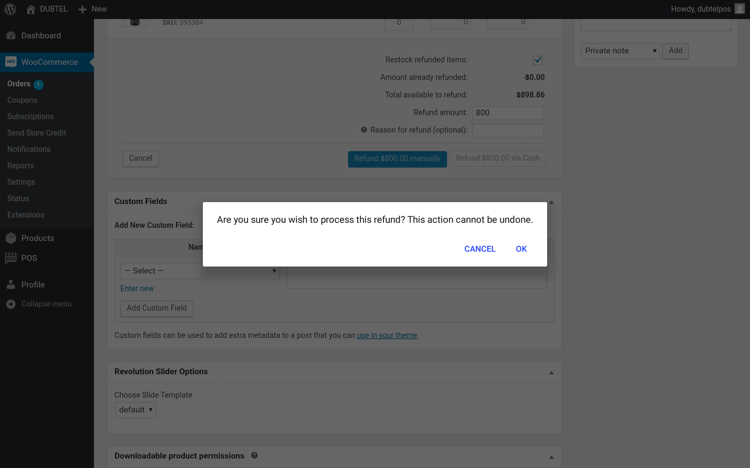
9. A dialogue box will appear to confirm the refund. Click OK.

10. The order detail page will show the refunded amount in red.


4. On the top you can see the buttons: �Add New�, �Import� and �Export�.
5. To add a single product, click the 'Add New' button.
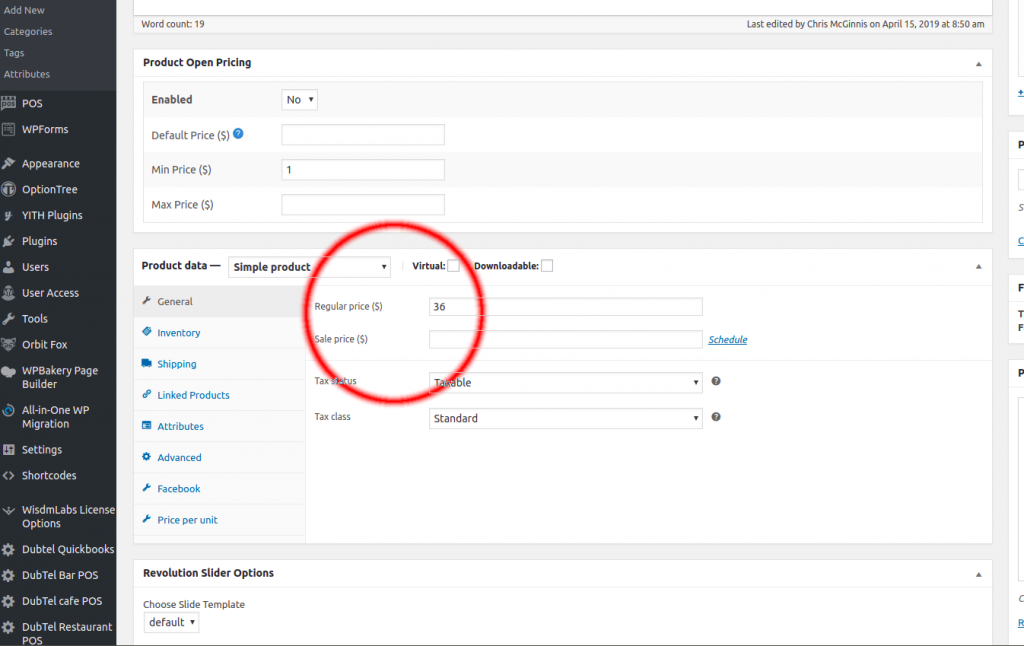
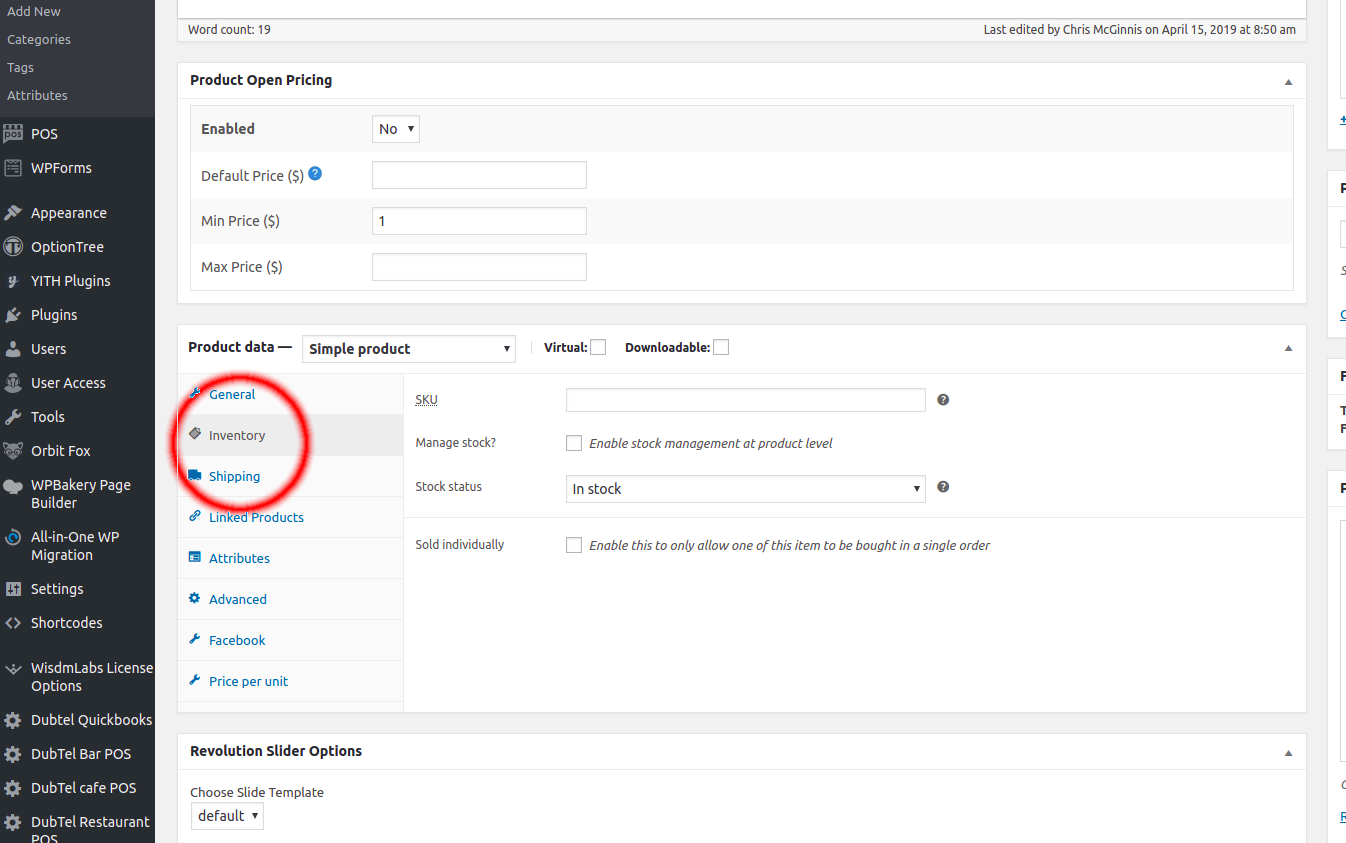
6. Enter Product Name, Description, Product Categories, Product Data, Product Tags and Product Gallery.

7. Click Publish. Product will be displayed on the cart.
8. To add multiple products, you can use import button.

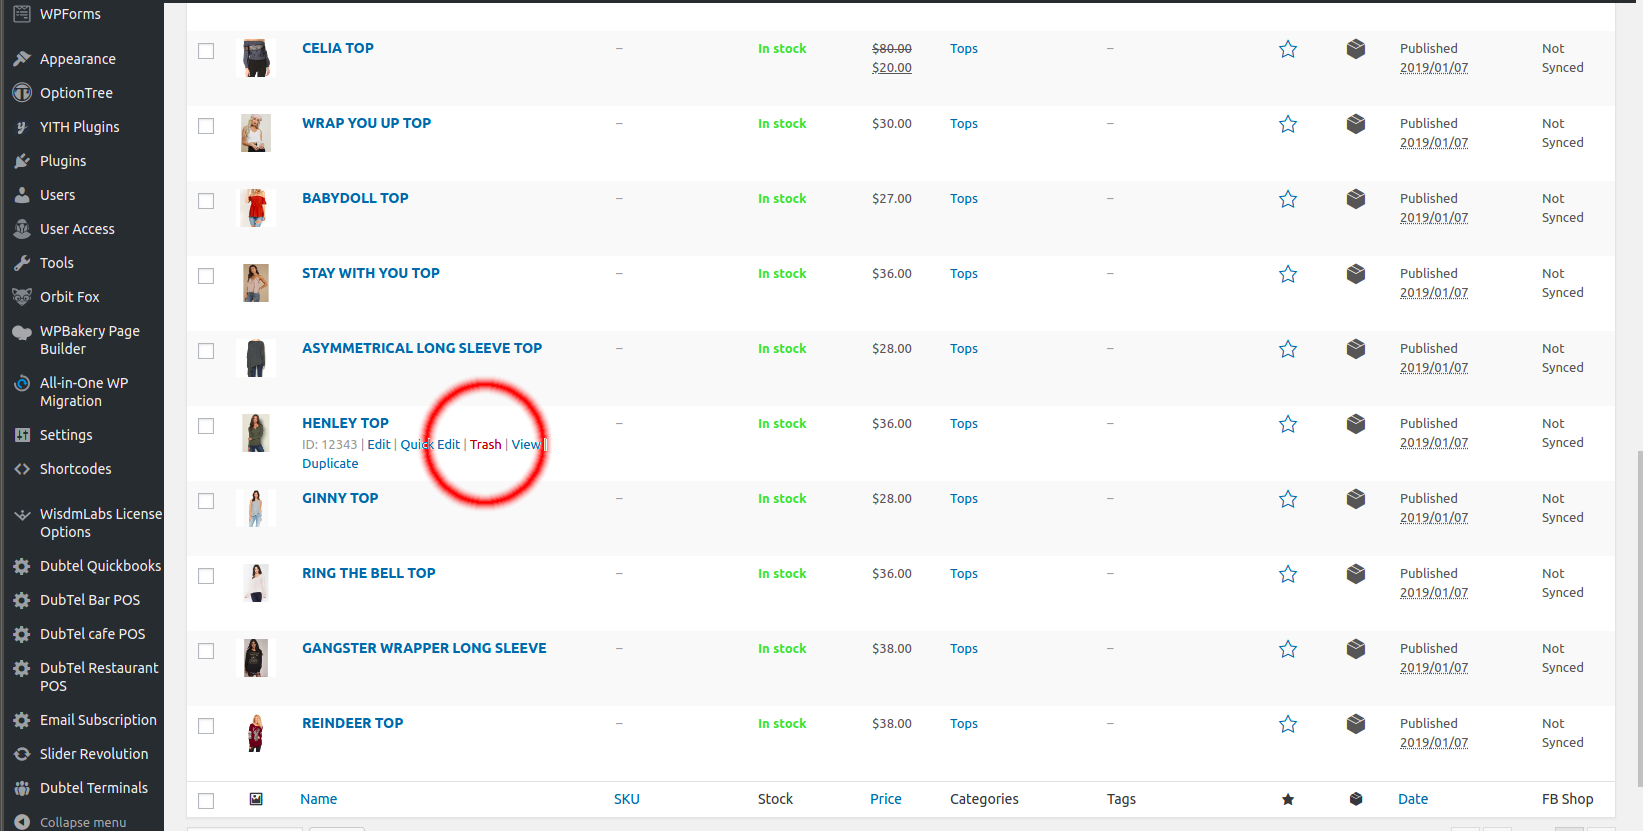
4. To change categories, scroll right to Product Categories section.
5. Update from predefined category sections.


Omni-channel retailing is an all-channel approach to sales that seeks to provide customers with a seamless or unified shopping experience, whether they're shopping online from a desktop, mobile device, or offline in a brick-and-mortar store.
Taking an omni-channel approach begins with a customer. In marketing realms, it means putting a message across to a customer anywhere the customer might be looking, listening, etc.
Customers can simultaneously use different channels in their shopping process, which means they can start their search in one channel and finish the purchase in another. They are given chances to create their own preferable shopping routines, which appears to be more attractive to a new generation of consumers in the 21st century.
According to research by the Aberdeen Group, companies with extremely strong omni-channel customer engagement see a 9.5% year-over-year increase in annual revenue, compared to 3.4% for weak omni-channel companies. Similarly, strong omni-channel companies see a 7.5% year-over-year decrease in cost per contact, compared to a 0.2% year-over-year decrease for weak companies.
This reveals that customers easily relate with companies with strong omni-channel strategy. In other to understand the nitty-gritty of omni-channel retailing, we must understand the following topics.
What Is Omni-Channel Retailing
In order to understand what omni-channel retailing is, let�s consider some of these following:
We could see from all of the above, that this strategy allows customers to start their search in one channel and finish the purchase in another. This allows a customer to see products and deals from their mobile devices and ship things for in-store pick up, ship them to their homes and even process returns or exchanges for previously-purchased items. This is what we mean by a seamless experience.
These definitions are valid but don�t quite explain the weight of the word �omni� meaning "all, every, the whole, of every kind," which implies �being everywhere,� not just offline and online.
Has being everywhere really worked out for companies? Yes, but it�s also very risky. The reason for this is that many retailers focus on trying to be everywhere, while they miss opportunities to innovate and jump past competitors.
How Omni-Channel Shopping Could Be
Omni-channel as a philosophy is about providing customers with a seamless or unified shopping experience, whether they're shopping online from a desktop or mobile device, or offline in a brick-and-mortar store.
Today, the average shopping voyage encourages various channels whereby a consumer may look for a coffee machine on your website, order the item via mobile while on his commute home, and finally choose to pick up his purchase in-store the next day. According to research from Google, 98 percent of Americans use multiple devices daily to research information on products and to make purchases.
What�s the Opportunity in Multiple Channels?
McKinsey Research and Harvard Business Review recently collaborated with a retailer in U.S to learn just how valuable omni-channel retail customers really are. The study included 46,000 customers who were questioned about every aspect of their shopping voyage during a 14-month period between June 2015 to August 2016, focusing on which channels they used and why. They were also asked to evaluate their shopping experience. Of the study participants, only 7% were online-only shoppers and 20% were store-only shoppers. The remaining majority, or 73%, used multiple channels during their shopping journey. It was observed that �Not only did [omni-channel retail customers] use smartphone apps to compare prices, but they were also avid users of in-store digital tools such as an interactive catalog, a price-checker, or a tablet.�
The study also found omni-channel retail customers spent an average of 4% more on every shopping occasion in-store, and 10% more online than single-channel customers. Which also means the more channel a customer is using the more they tend to spend.
Everywhere commerce is so valuable because it is a rapidly-growing consumer outlet that isn�t showing signs of slowing. If you�re selling, and your long-term plan is to continue doing so for the foreseeable future, you will need to pay attention to e-commerce and become an active participant as soon as it�s feasible for your business.
Where a physical store may only be known to passersby, online retailers have greater visibility to a wider audience. Therefore, an e-commerce store can be accessed and viewed by an unlimited number of internet users. Some of the best ways to attract new customers. According to Nielsen�s Total Audience Report, Americans spend an average of 10 hours and 39 minutes of their day in front of a screen.
The world is digitizing in every sector. Therefore, the reason the omni-channel customers are so valuable is because the real omni-channel business attempts to be anywhere their target customer might need or want their products.
How to Create Immersive Experiences
Though the prefix �omni� implies being everywhere, it�s obvious that you can�t really be everywhere. The best thing to do is to create the illusion of being everywhere. Which can be done by creating a network of concentrated and overlapping outlets for advertising, public relations and SEO efforts.
If screens are everywhere, then there must be a place people are looking at to discover new brands. The following steps should be considered:
What Omni-Channel Shopping Feels Like
The following is from Tom Walker, on his experience with Mission Workshop on what omni-channel shopping feels like.
The first day exposes him to more information about the brand and product throughout multiple touch points, without forcing him to visit the website again, and without feeling like Mission Workshop is trying to pressure him into making a purchase.
Second and third day, he was re-targeted by the ads placed on his social media page, which are ads with more information about the item he saw on the first day. These ads allowed him to know more about the item�like how it can be used, other accessories to use with it, and the lifestyle of that particular brand.
On the fourth day, the ads prompted him to consider visiting one of their local partners and try their products on in a store and call to schedule a consultation with one of their stylists.
Therefore, omni-channel shopping ought to be a steady release of non-intrusive information designed to give customers everything they need to feel comfortable buying an item from the company.
What�s next for Omni-Channel Retailers?
The fact is that the philosophy behind omni-channel retailing deepens day by day. We will eventually be in a time single-channel retail, marketing, and merchandising will be as obsolete as the video store and we won�t give it a second thought. The pressure is on and not going to stop as digitization of things increases.